Drupal 9 gives developers and site owners the flexibility of creating bespoke components that can be put together to build compelling digital experiences. Themes are Drupal’s design blocks that represent the visual appearance of a website. Drupal 9 comes with choices of core themes and third-party themes with the most popular being the Bootstrap theme. However, if none of the Drupal 9 themes cut it for you, you should probably be looking at custom theme development. With Drupal 9 custom themes, you can tailor-fit your design to the exact requirements.
Drupal 9 provides Bartik as the frontend theme for Drupal, but if you need a Drupal 9 custom theme then you can create your own Drupal 9 theme development, thus improving your Drupal theming skills. The easiest way to really understand Drupal 9 theme development is to practice and create one from the ground up.
Drupal 8 has now reached EOL. Now is the time to migrate to Drupal 9. However, if you're still trying your hands out at creating a custom theme in Drupal 8, these steps will work for a Drupal 8 setup too.

Getting Started with Custom Drupal 9 Theme Development
Let’s get started with creating a Drupal 9 theme for our Drupal website.
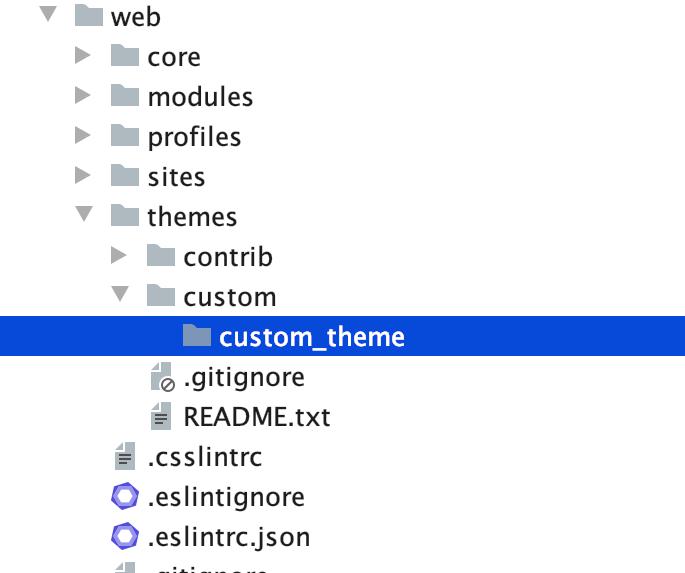
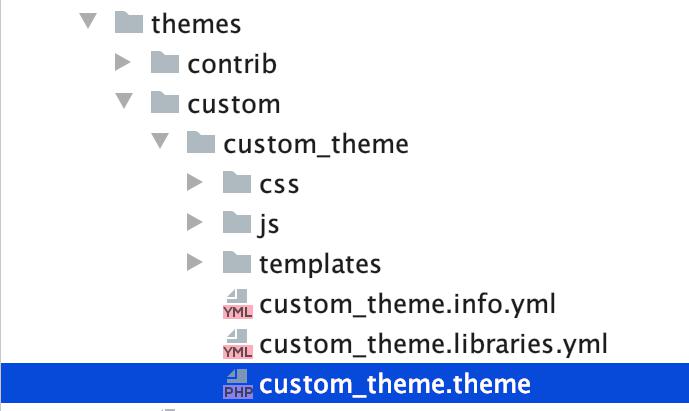
STEP 1 : First, we need to create a custom theme under ‘web/themes/custom’ folder. We will name the folder as custom_theme.
STEP 2 : Next, we will need to create an info.yml file. We need to specify the basic keys for it. Let us specify it over here -
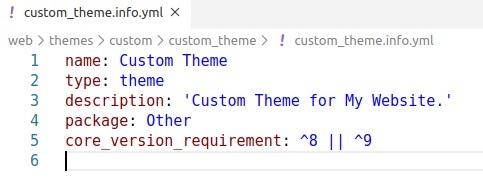
CODE:
name: Custom Theme
type: theme
description: 'Custom Theme for My Website.'
package: Other
core_version_requirement: ^8 || ^9
STEP 3 : Now, let’s create a libraries.yml file to specify all the libraries we need (CSS AND JS) for our custom Drupal 9 theme. We will also create CSS and JS directory and its files to link it in here. We are going to name the library as global-styling.

CODE:
global-styling:
version: 1.x
 js:
js/script.js: {}
 css:
theme:
css/style.css: {}
STEP 4 : After creating the libraries.yml file, we need to link it to our theme. For this, we are going to add it in the info.yml file which will then apply it to the whole theme.
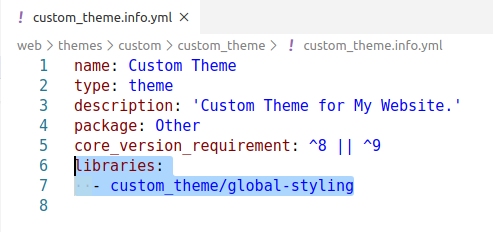
CODE:
libraries:
- custom_theme/global-styling
So, the key will be libraries and path will be the theme name - ‘custom_theme’ / library name - ‘global-styling’.
STEP 5 : Next, we need to inherit the ‘Base Theme’.In our case, we will inherit the ‘classy’ theme which is a Drupal core theme. So, the key will be the base theme in info.yml.
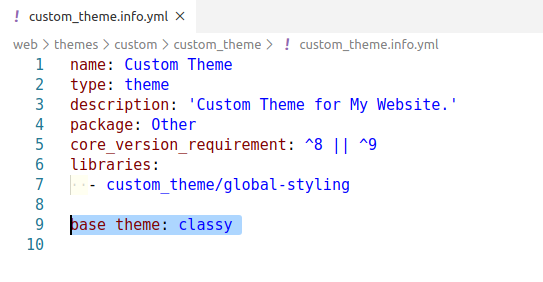
CODE:
base theme: classy
STEP 6 : Now, we will define the‘regions’ for our theme. In info.yml, we have to define it under the ‘regions’ key.

CODE:
regions:
branding: Branding
navigation: Main navigation
search: Search
featured: Featured
content: Content
right_sidebar: Right sidebar
footer_first: Footer First
footer_second: Footer Second
footer_third: Footer Third
footer_bottom: Footer Bottom
Under ‘regions’ key, you can define your regions for the custom Drupal theme. Here,
branding: Is the id of the region which should be lowercase letters.
Branding: Is the name of the region which can be uppercase letters.
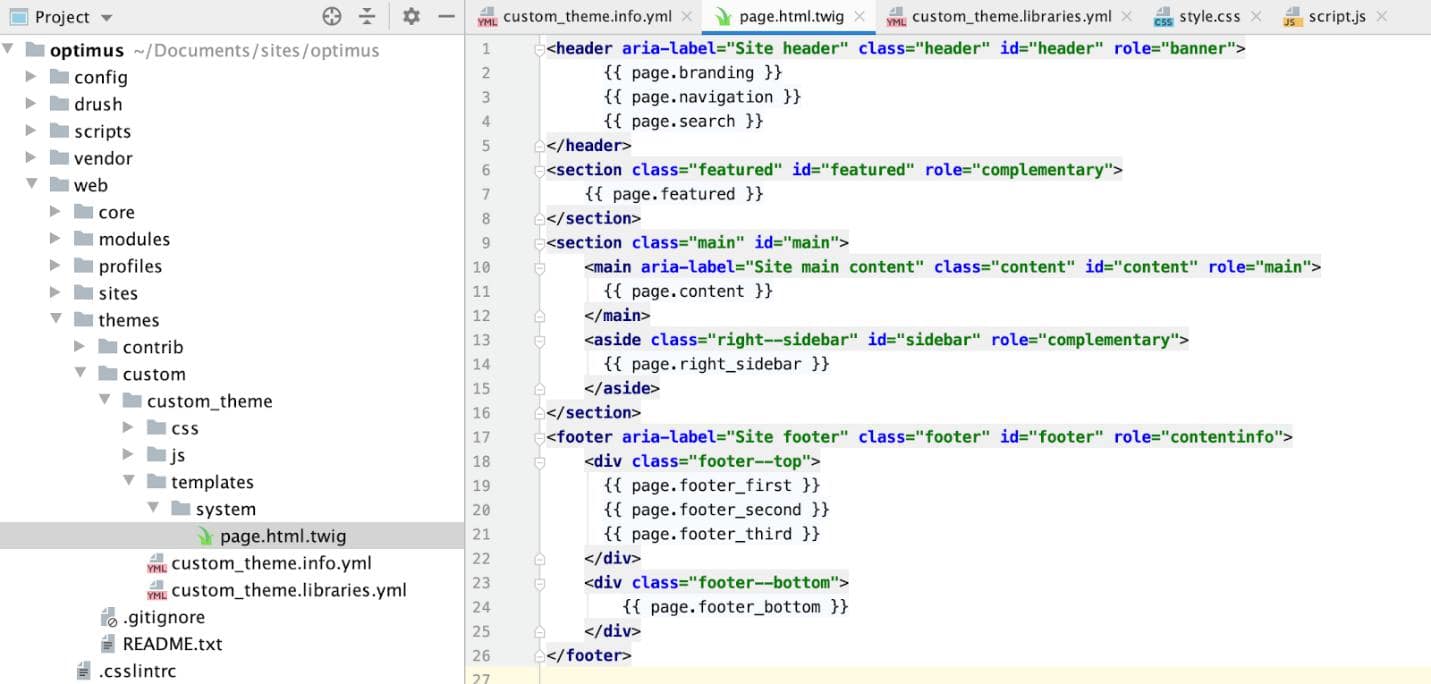
STEP 7 : After we have defined our regions for our custom Drupal theme, we need to override page.html.twig to grab our ‘regions’instead of the classy theme’s. We will create templates/system directory under which we will create the page.html.twig.
CODE:
<header aria-label="Site header" class="header" id="header" role="banner">
     {{ page.branding }}
     {{ page.navigation }}
     {{ page.search }}
</header>
<section class="featured" id="featured" role="complementary">
   {{ page.featured }}
</section>
<section class="main" id="main">
   <main aria-label="Site main content" class="content" id="content" role="main">
     {{ page.content }}
   </main>
   <aside class="right--sidebar" id="sidebar" role="complementary">
     {{ page.right_sidebar }}
   </aside>
</section>
<footer aria-label="Site footer" class="footer" id="footer" role="contentinfo">
   <div class="footer--top">
     {{ page.footer_first }}
     {{ page.footer_second }}
     {{ page.footer_third }}
   </div>
   <div class="footer--bottom">
       {{ page.footer_bottom }}
   </div>
</footer>
In page.html.twig, we will create the HTML structure for our regions. As you see in {{ page.branding }} – Here,
page - Is the key to render ‘regions’ in the page
branding- Is the region which we have defined in info.yml file.
So now, we have created our regions and rendered it on the page.

Step 8 : Go to Appearance in your Drupal site. You can see your custom Drupal theme present in the Uninstalled themes section.
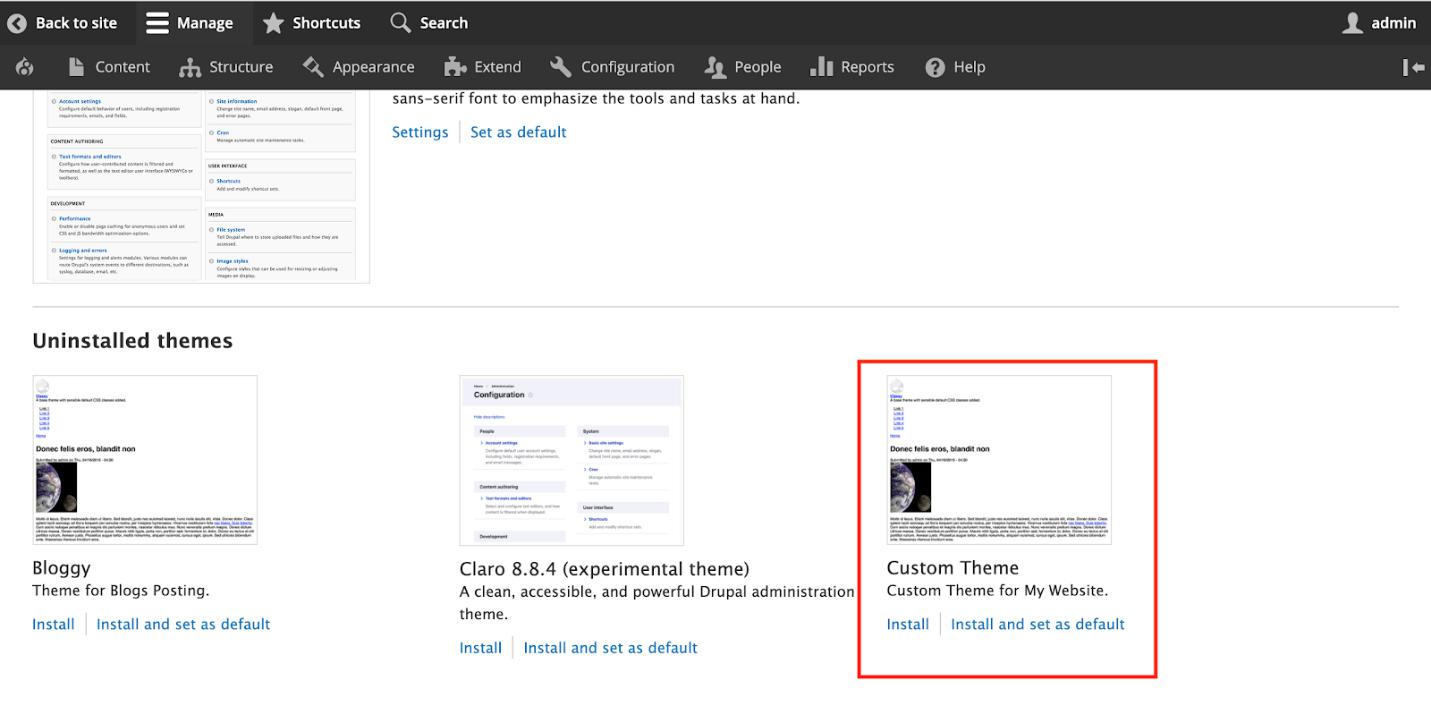
You need to click ‘Install and set as default’ option to install your Drupal theme on the site.
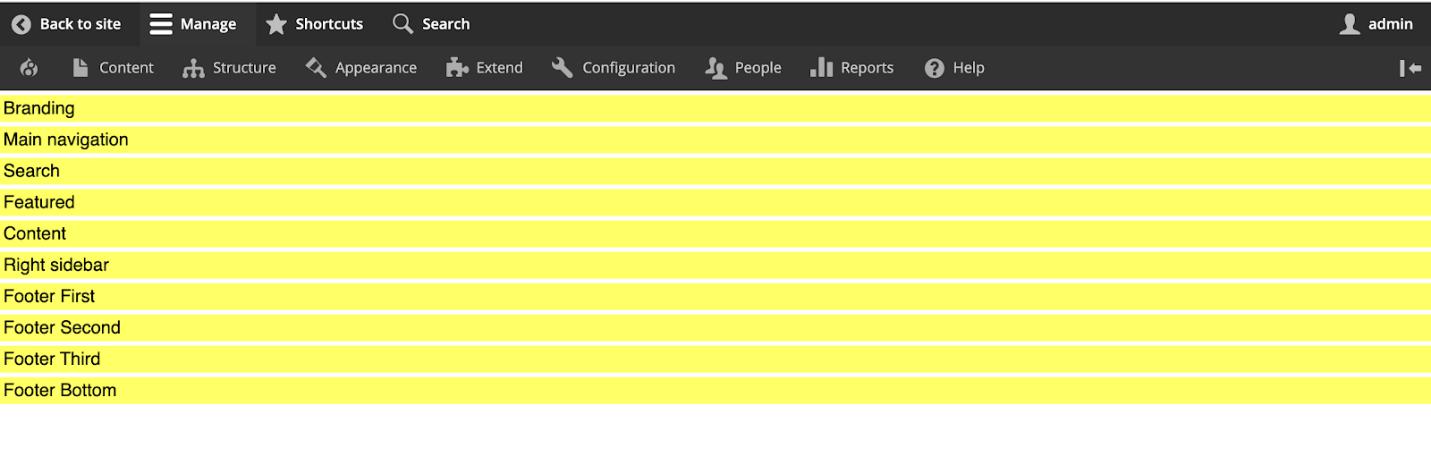
After it is installed, go to Structure -> Block Layout. Your Custom Theme will appear under the Block Layout.

You will see a link for ‘Demonstrate block regions (Custom Theme)’.Click on the link. You can see all the regions that you had declared in the info.yml and added in page.html.twig
Step 9 : You are now almost done with theming in Drupal 9! Next, you need to apply styles in the CSS for each region as per your design. We will use CSS in this case; You can even use SCSS if you’d like. Just inspect the branding region - you should see the region class and then add the CSS to that class.
Add CSS in style.css as per your requirement.
.header{
 display: flex;
 justify-content: space-between;
 padding: 10px;
}.header.region {
padding: 5px;
}.header.region-branding {
flex: 0 1 20%;
}.header.region-navigation {
flex: 0 1 50%;
}.header.region-search {
flex: 0 1 30%;
}.region.block-region {
padding: 15px;
}.featured{
padding: 40px 20px;
background-color: indianred;
}.main{
padding: 50px 0;
display: flex;
justify-content: space-between;
}.main.content {
flex: 0 1 65%;
}.main.right--sidebar {
flex: 0 1 30%;
}.footer--top {
display: flex;
justify-content: space-between;
padding: 10px;
}.footer--top .region {
padding: 5px;
}.region-footer-first, .region-footer-second, .region-footer-third {
flex: 0 1 30%;
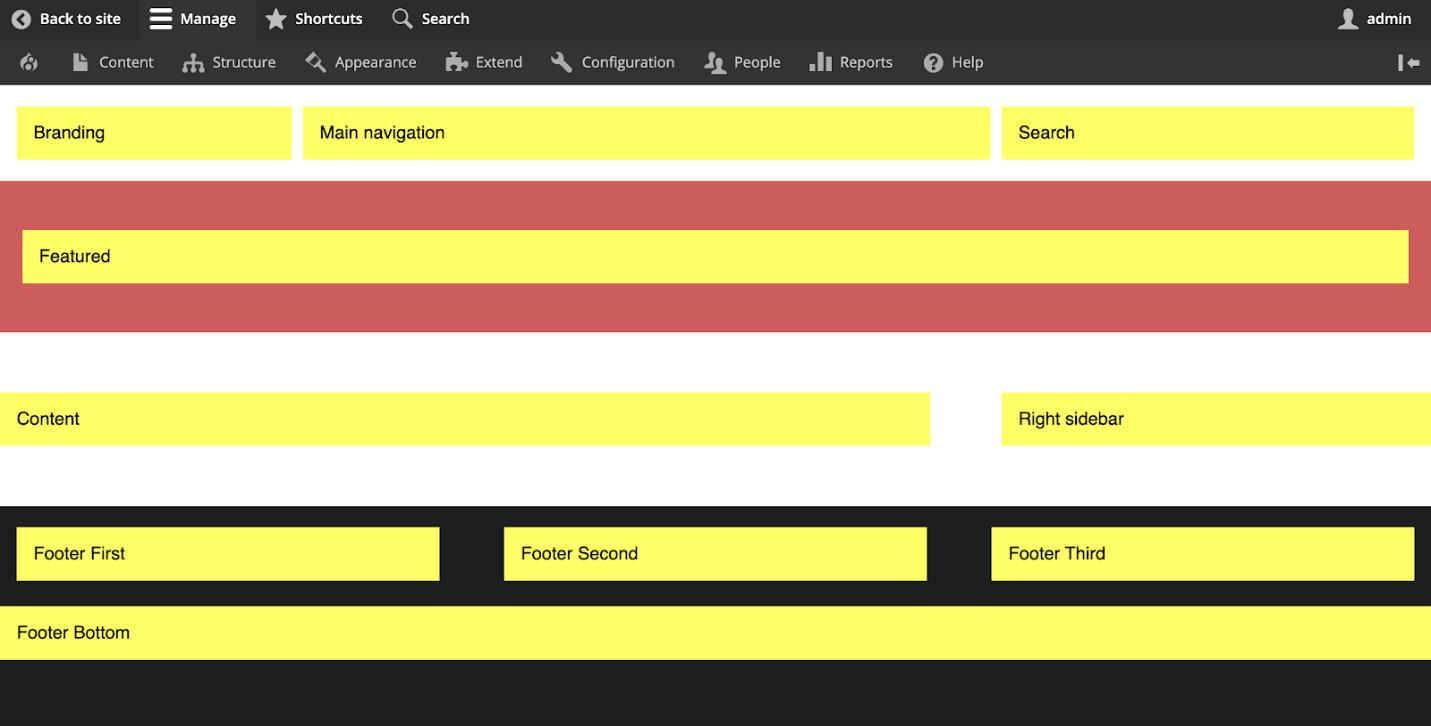
}The Result:
Your Drupal 9 Custom Theme is ready!
If you need to write any hooks or create suggestions for your twig file, you could add the .theme file in your custom Drupal theme (shown below).
Sure, ready-made themes in Drupal 9 like Bootstrap, are easier to work with and implement but they do not always satisfy the granular requirements of a website design. Custom theme development gives you freedom to design themes that are bespoke to an organization. Here’s hoping this brief guide helps you get started with theming in Drupal and developing Drupal 9 custom themes for your future projects. Looking for expert Drupal developers to help you build unique custom themes in Drupal for your next Drupal 9 website? Contact us now.

Neslee Canil Pinto
Related Insights


Don't Miss Out!


